We made our sculptures first out of wax. After the wax piece is finished, a pouring spout or base must be attached with sprues or vents leading from it to the sculpture to allow air to escape during the pour. After these are in place, the whole thing is dipped into a slurry solution, then into fine sand to create a crust that can be fired into a rigid shell. The molten bronze will be poured into that shell.
The wax filled shell being placed into a gas-fired furnace. The wax will be burned out, leaving the shell hollow.
The shell, cooling down after the burn.
How the furnace looks during the burn; the wax makes a great, big, smoky fire! Very fun.
The next day, we lit the bronze furnace, again gas fueled and began to melt the bronze. Here we have ingots and scrap from a previous pour.
The shells are placed open side up into a steel drum support, then aluminum foil is put over the opening to avoid molten metal splash as the pour first begins.
Here is my piece, ready to be poured.
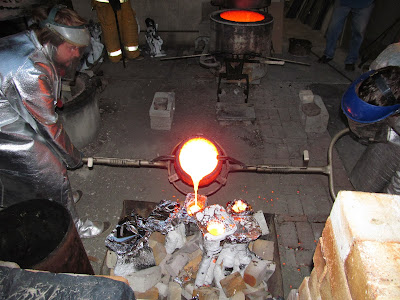
We poured for hours. I included some photos I took after dark, as they are more dramatic! There is a beauty and thrill in this process.
Pouring...
and pouring..
The crucible being put back into the furnace to be reheated and refilled for the next group of molds.
The molds, filled and cooling off.
After they are cooled, the hard shell must be chiseled off. It is chalky and difficult to remove from small nooks and crannies and takes a lot of time to clean up. The sprues and pouring spout also have to be cut off and the places where they were attached ground down and smoothed off. This is the most difficult and time consuming part of the process.
Here, the ceramic shell is finally gone, and the piece is in the process of polishing and buffing for the desired finish. A metal wire wheel was used to bring the bronze to a clean, shiny finish.
After it is polished and cleaned up and ready to go, a chemical patina is added by first heating the piece with a propane torch until it reaches 300 degrees. Then, chemicals are sprayed on to add a colored patina to the piece. For more information about this process, see: http://www.sciencecompany.com/Patina-Formulas-for-Brass-Bronze-and-Copper-W160.aspx#2
After the patina has been added, use a wire wheel to remove some of it in the high spots to allow the bronze color to show through.
After the finish is complete, a coat of paste wax is added for shine and preservation.
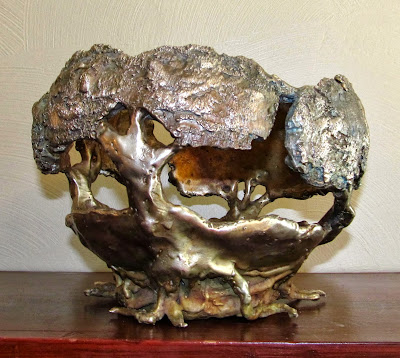
This sculpture weighs nearly 18 pounds. I will make a base, and be ready to display it. Or use it as a weapon should the need ever arise!!


2 comments:
That is so cool! And you are right...the process itself is, indeed beautiful!
Thanks, Juliana!
Post a Comment